Neonzing LED Neon Light Installation Guide
When you purchase custom LED neon lights from Neonzing, we offer you three convenient installation methods: installation with mini screws, installation with stand-off screws, and installation with suspension wires. Mini screws and stand-off screws are provided by default. If you have special requirements, you can contact us at any time. The following are the detailed installation steps:
I. Installation Method with Mini Screws
This method is suitable for neon lights equipped with a cut acrylic backing plate. It's simple to operate and can be easily completed:
1. Positioning and Marking: Place the neon light flat against the installation wall, avoiding scratches. Use a marker pen to mark the positions of the pre-drilled holes.
2. Drilling Preparation: Move the neon light aside and use an electric drill with a suitable small drill bit to create pilot holes at the marked positions.
3. Fixing and Installation: Place the black (or gold/silver) rubber washers over the holes, align the neon light with the pilot holes, and screw in the small silver screws for fixation.
4. Detail Completion: After all the screws are fixed, install the small silver end caps. Finally, connect the transformer and plug it into the power source to light up the neon light.
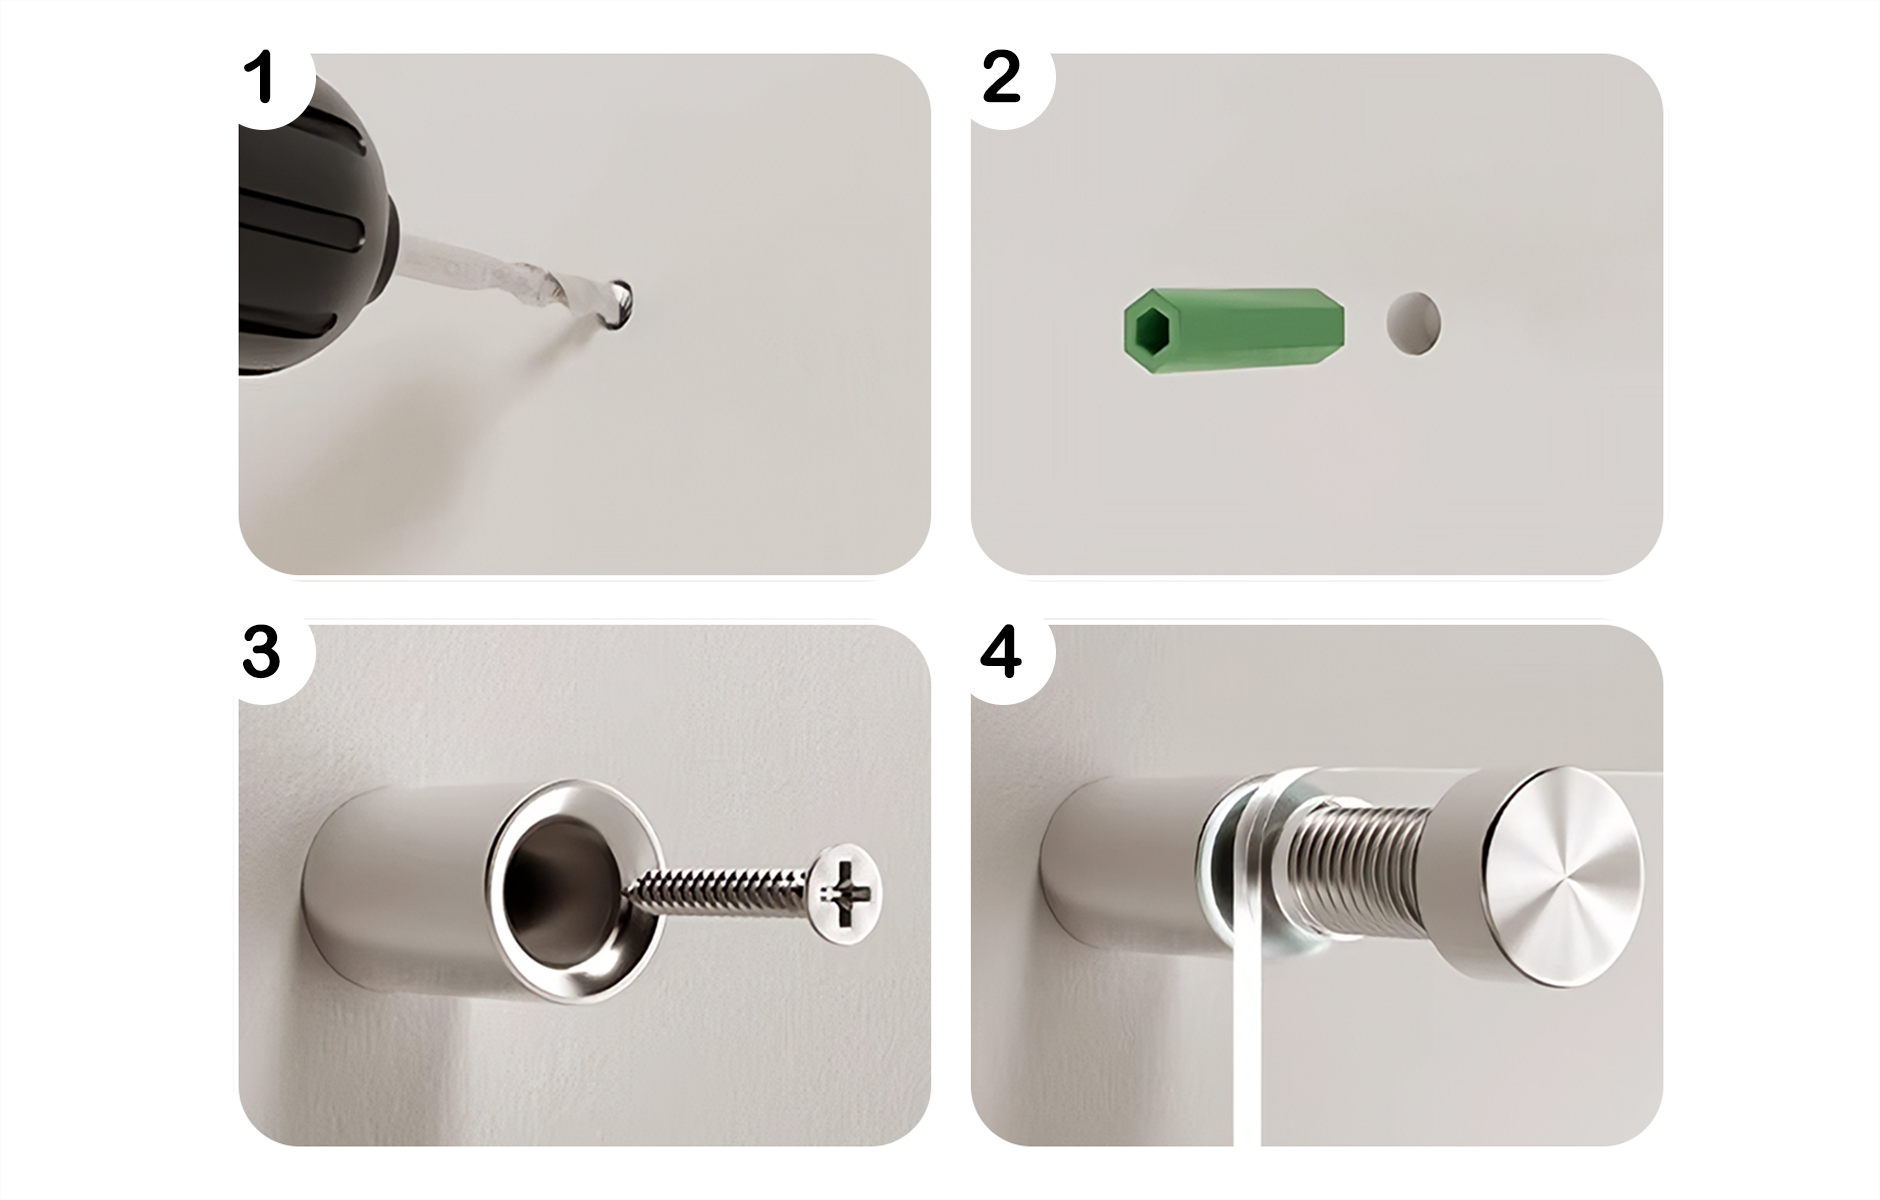
II. Installation Method with Stand-off Screws
1. Precise Positioning: Place the neon light flat against the wall, align the position, and then mark the pre-drilled holes.
2. Drilling Operation: Place the neon light properly to prevent scratches and create pilot holes.
3. Base Fixing: Unscrew the mounting pins, align the hollow bases with the pilot holes, and insert the small screws for fixation.
4. Sign Fixing: Align the neon light with the bases and fasten it firmly with wide screws to ensure stability.
5. Power-on Test: Connect the transformer and turn on the power to check if the neon light lights up normally.

III. Installation Method with Suspension Wires
This method is suitable for creative hanging needs, creating a unique visual effect:
1. Measurement and Marking: Measure the spacing between the pre-drilled holes on the backing plate of the neon light and mark the positions of the silver vertical mounts on the ceiling.
2. Fixing and Installation: Mark the screw hole positions of the mounts, drill holes, and then fix the mounts with screws.
3. Wire Handling: Cut the suspension wires according to the required length, leaving extra length for making loops.
4. Connection and Hanging: Insert the wires into the clamping mouths of the mounts. Pass one end of each wire through a silver crimp terminal and the hole on the backing plate, then pass it back through the other hole of the crimp terminal and fix it by pressing the crimp terminal with pliers.
5. Installation Completion: Connect the transformer and turn on the power to enjoy the moment when the neon light is lit up.
